


 Wheel Arch Cover Installation
|
Macy's Garage, Ltd. America's BEST Triumph Shop! |
Installing the rear wheel arch cover upholstery in TR2-4A sports cars can be done by any Triumph owner who wishes to install his own interior, but requires care and planning to accomplish without wrinkles and bubbles. These covers should be the first pieces to go into your new interior, and whether they look "right" or not will set the tone for your whole interior installation. Follow along with the photos below as I install a pair of these covers in a client's TR3A.
|
|
|
|
| The first thing to consider is the padding
under the new covers. If you received this thick "carpet padding" for
under your wheel arch covers, THROW IT AWAY! TR2/3's had a THIN pad on the top surface only, and TR4/4A wheel arches are completely padded (but it should all be THIN!). |
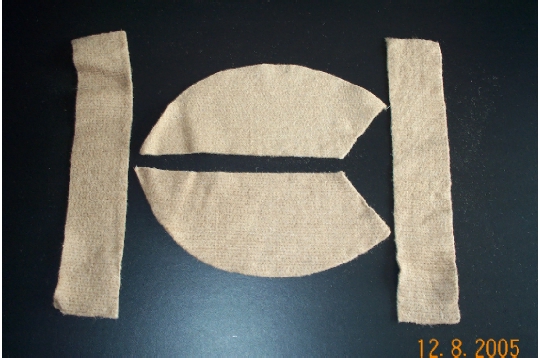
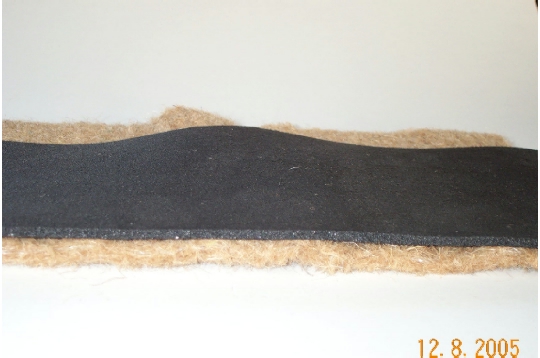
Here's a comparison of the thick carpet pad (bottom), and a more appropriate 1/8" thick "landau top pad". The landau top padding should be available locally from any auto trim shop, or from the macysgarage.com "parts" page. The 1/8" thick pad will more closely resemble the original padding thickness, and does a better job of holding the wheel arch covers in place. | There is a difference between the left and
right wheel arch covers, so before you go too far, lay them loosely in place
and make sure you know which side is which!
Also inspect your wheel arches, and make sure there are no big bumps or dents. The thin padding (or no padding in the case of TR2/3 inner sides) will not hide any imperfections in your panels. |
|
|
|
|
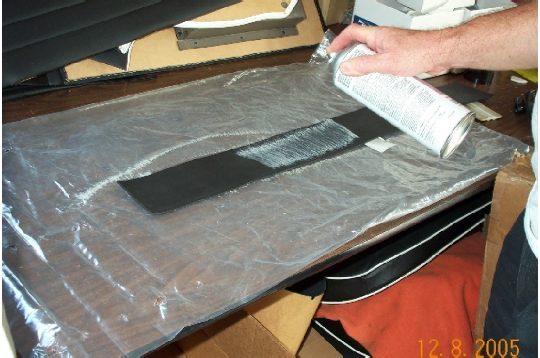
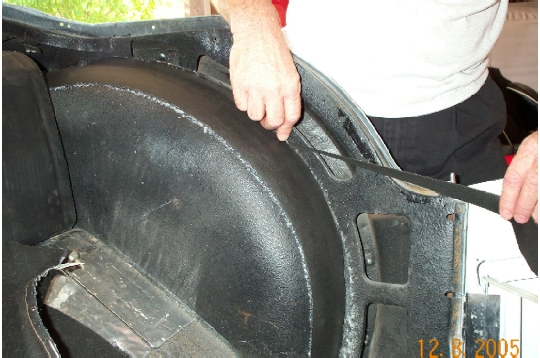
| Carefully fold the narrow top section back without shifting the cover position, and mark the location of the seam on the wheel arch. | I've let the cover drop away so that you can see the chalk line indicating where the seam will lay when the cover is installed. This should be close to the center of the small curved radius of the wheel arch. | A good spray contact adhesive will be necessary to install your covers. I prefer 3M #08088, and it needs to be applied to both surfaces. Here I'm spraying the padding for the top of the TR3A wheel arch cover. |
|
|
|
|
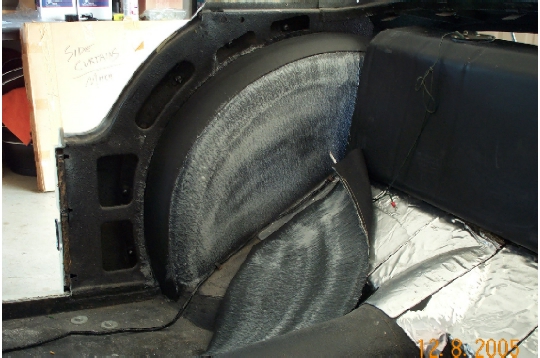
| Spray a good coating of glue where the pad will attach to the wheel arch. Wait for the glue to dry 4-5 minutes before installing the pad. | Don't let the pad touch the wheel arch until you have it in the correct position. Once they touch, it's there to stay! Also be careful that the padding does not fold over and touch itself. | Smooth out all wrinkles as you go because you won't get a second chance. If you're doing a fully padded TR4/4A wheel arch, install the side padding in the same manner but leave a 1/2" gap between the top and side padding for the seam material & piping to lay in. |
|
|
|
|
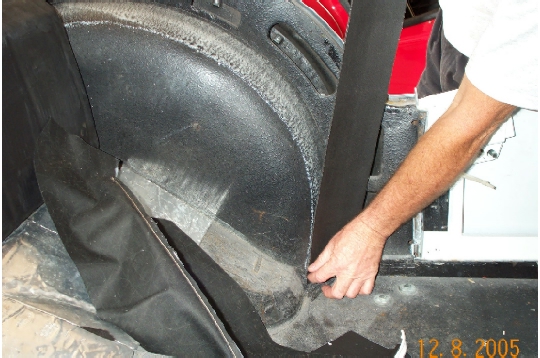
| Use a single edge razor blade to trim the excess padding from the outside edge of the wheel arch. | Remove any excess padding which might extend "up" above the wheel arch. | Spray glue to the inner side of the wheel arch (on top of the padding for TR4/4A), and to the side of the cover. As always, allow to dry slightly before proceeding. |
|
|
|
|
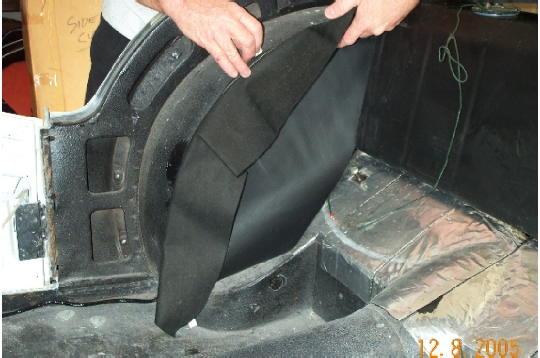
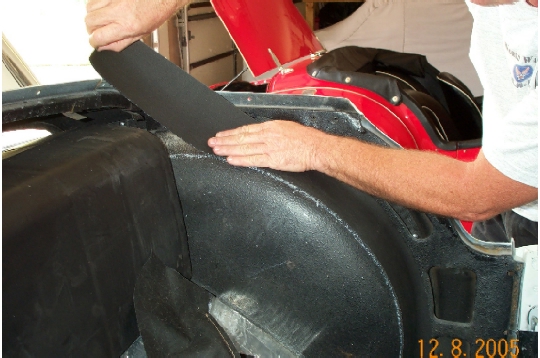
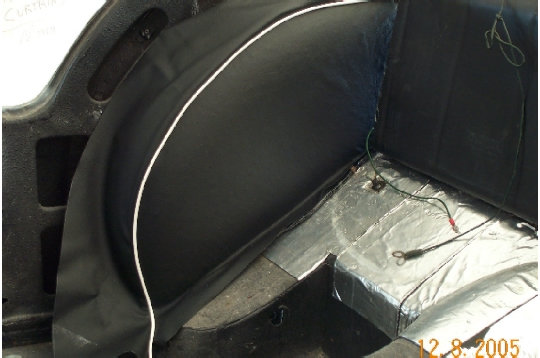
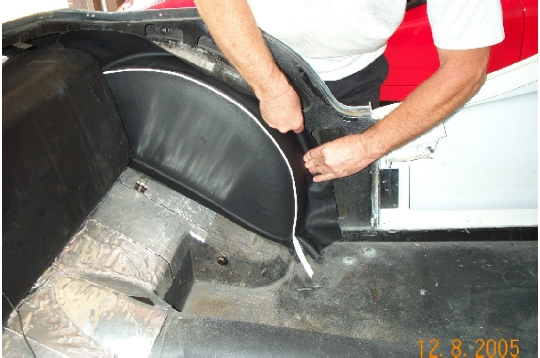
| CAREFULLY position the cover so that the seam and piping are along the line (from photo #4), and stretch to smooth all wrinkles as you go. A second set of hands to hold the cover away from the wheel arch until it's in position will be a tremendous help. | Fold the top of the cover back and apply glue to the cover and the padding. Don't be too concerned with glue overspray, as it can be easily wiped off (without damage to leather or vinyl) using old fashioned lighter fluid. | Pull the cover top over the padding and into position. I like to start in the center, and "roll" the top section into place, pulling and stretching slightly as I go. As before, you'll only get 1 chance at this, so work slowly and watch for the wrinkles and bubbles that will try to form. |
|
|
|
|
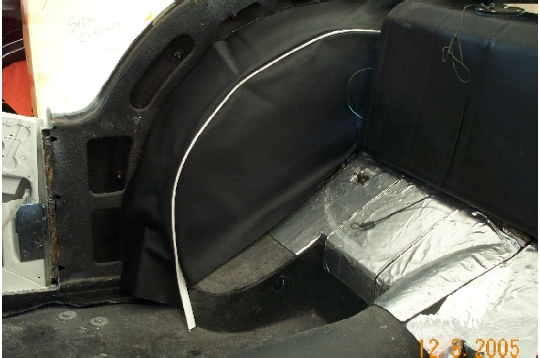
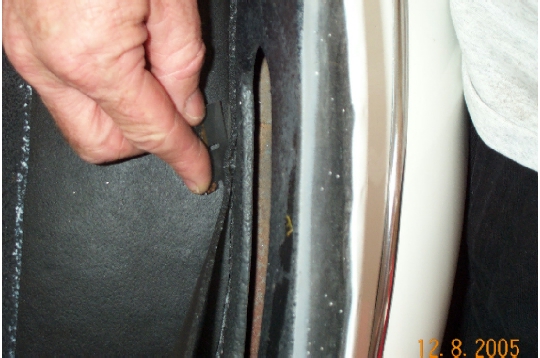
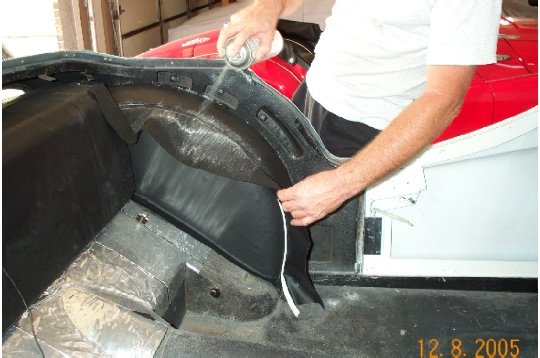
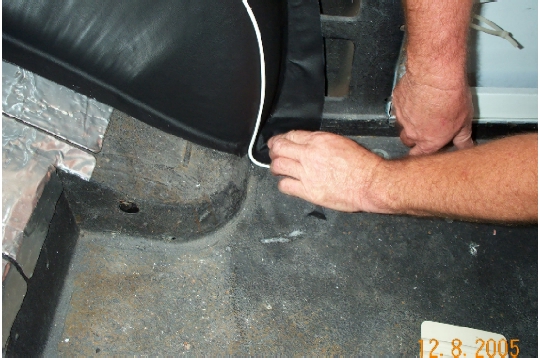
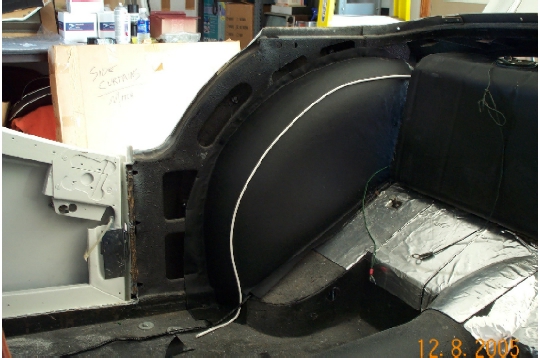
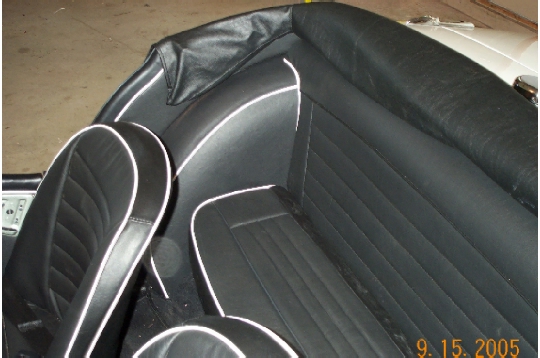
| Trim in the corners and around the edges so that the excess cover will lay flat against the floor. Leave the excess in place so that there won't be any visible gaps when the carpet is installed. | Completed wheel arch, ready to receive the surrounding interior trim. (You might have noticed from the sloping rear floor that this is a Pre-TS60000 car.) | And here's the completed interior with the optional "Occasional Rear Seat" installed. Smooth and wrinkle free wheel arches with just the right amount of padding sure look good! |