© 2026 - Macy’s Garage, Ltd.
Macy’s Garage

STEERING
BOX-3
TR2-3B Steering Box Rebuild - Page 3
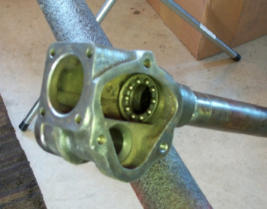
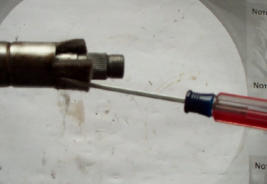
New bushings MUST be reamed to fit the rocker
shaft. We use an adjustable ⅞” reamer, and go
slowly reaming in several steps. You want these
loose enough to be able to move the rocker shaft
back and forth by hand, but not so loose that you
have any side to side movement. As little as
.001” either way will make a huge difference, so
don’t be in a big hurry to get this step done.
Perhaps you should order 2-3 bushings, just in
case you destroy the first one!
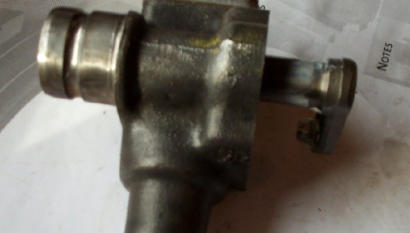
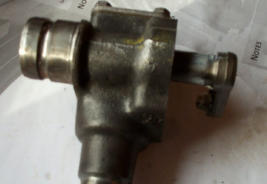
Install the new lower seal next, and be sure to
install it in the correct orientation! It won’t hold
the oil in the steering box if you put it in upside
down. This should be obvious, but I mention it
because we have seen several over the years
that were installed upside down, so this concept
must escape some folks.
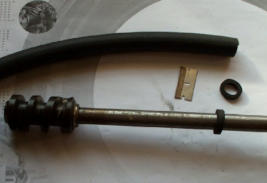
If you have an early one piece column, be sure
to install the two rubber anti-rattle rings on the
inner column. If you forgot to order these, you
can cut acceptable substitutes from 5/*” heater
hose.
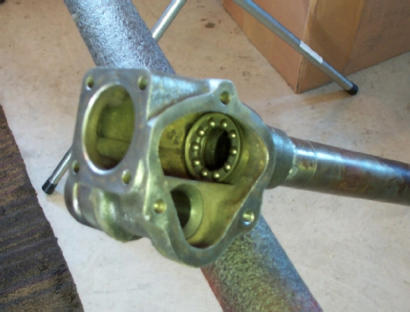
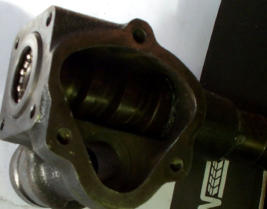
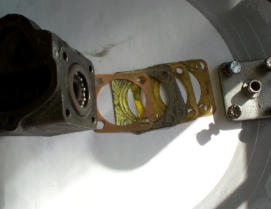
Next part to go in is the upper bearing race, then
the upper bearing. Make certain that the upper
race is fully seated at the top of the box, and
then install the bearing in the right direction so
the balls roll on the race. You guessed it, we’ve
seen plenty instances of this screw-up as well!
Slide the inner column and worm gear into place,
and watch that the upper bearing and race stay
in position. Then you can install the lower
bearing, followed by the lower race. The
bearings actually ride on bearing surfaces on the
top and bottom of the worm gear, as well as the
two races you have to install during re-assembly.
Shims must be perfectly clean with no specs of
dirt, or oil will seep out between the shims. If
you can’t clean your old shims, or they have
slight grooves from being bent, it’s best to
replace them. You’ll have to assemble and
disassemble this many times, adding and
removing shims until there is zero end play, and
just the slightest amount of drag on rotation.
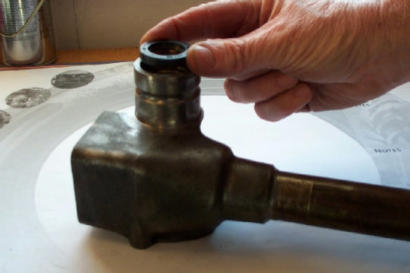
The top of the column tube needs a bushing. If
rebuilding a one piece column, it is a piece of felt
as shown here. TR owners with the two piece
columns have a pair of nylon and rubber
bushings on either side of the center coupling,
and the bushing at the top of the lower tube will
need to be installed before you insert the shaft
and worm gear, and preferably before installing
the upper bearing race and bearing.
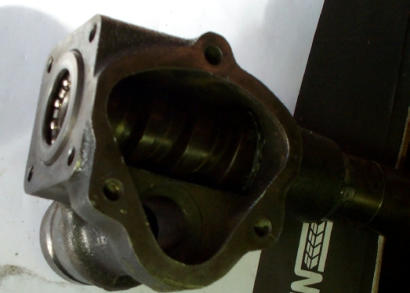
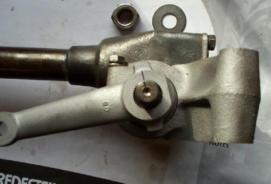
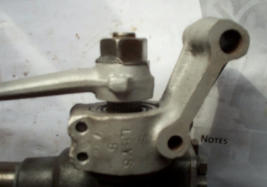
Now you can install the rocker shaft through the
top opening. Double check to make sure the
peg is fully seated in the rocker, and then that
the peg sits down correctly into the worm gear.
Follow up with the top cover and a new gasket,
and leave the adjusting screw a little loose for
now.
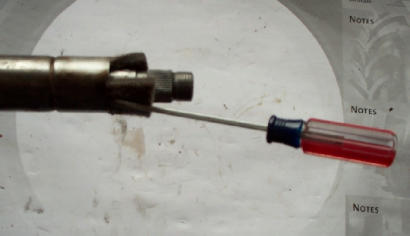
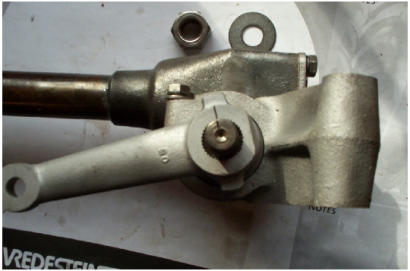
Slide the mount casting back onto the steering
box, followed by the drop arm. Note the
reference lines on the drop arm and in the center
of the rocker shaft. You don’t want to install this
and be “off” even one spline in either direction!
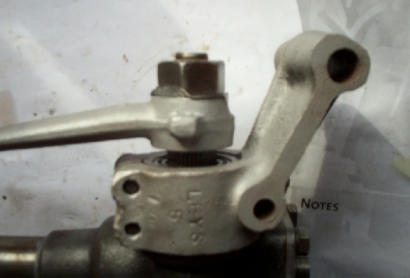
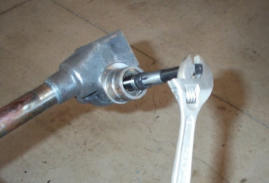
Install the lock tab washer, followed by the large
nut. Just as with the removal, you’ll want to hold
the drop arm securely and torque the large nut to
80 ft. lb. Then you can bend the tab washer over
one of the flats on the large nut.
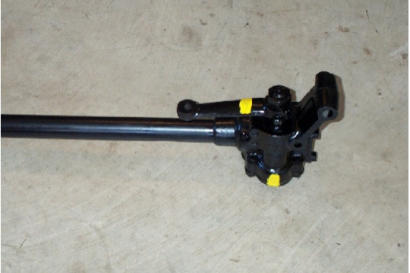
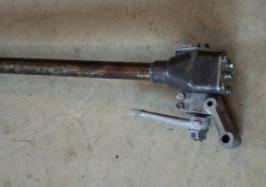
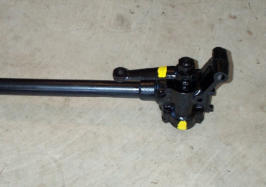
Now that everything is back together and you’re
wrestling match is over, it’s tome to paint your
steering box assembly before installation back
into your car.
When you install the completed unit back into
your car, and start tightening all of the braces at
the bottom working your way to the top so you
don’t put the column in a bind anywhere. Adjust
the top plate screw so you feel a slight drag on
the steering wheel as it passes through the
center, and then tighten your silent bloc bushings
with the steering wheel centered and the tires
pointed straight ahead. Fill with oil!

If you don't have access to a press or don't want to buy a reamer, you can send your disassembled steering box and rocker shaft here and we'll install the
rocker shaft bushing and ream it to size for you.
Not interested in doing any part of this yourself? Box it up and ship it here for the crew at Macy's garage to overhaul for you. For basic service, we
completely disassemble your old steering box, evaluate the condition of all the parts, bead blast and paint the box and column if you desire, and replace
the lower bushing and oil seal, (which are always bad). There's a 50/50 chance that the rocker shaft peg and inner bearings/races will need to be replaced
too. We always keep a good supply of new parts in stock, including bearings and races which are difficult to find more often than not and those expensive
worm gears which are needed occasionally. We don’t have to tear down your steering box and evaluate it’s need before ordering parts, so normal turn
around time is usually only 7-10 days, depending on our workload. Estimating restoration work is normally next to impossible, but we’ve done so many of
these that we have it down to a science. For a complete rebuild on a TR2-3B steering box, we are able to Flat Rate these at 7 hours of shop time at our
current labor rate, plus parts as required once we get a look inside.
If you're interested in having Macy's Garage overhaul your TR2/3 steering box, call or send an e-mail to discuss in greater detail. We're always happy to
help you out!
America’s BEST Triumph Shop


© 2026 - Macy’s Garage, Ltd.
Macy’s Garage


America’s BEST Triumph Shop

TR2/3 Steering Box
Rebuild - Page 3
New bushings MUST be reamed to fit the rocker shaft. We use an adjustable ⅞” reamer, and go slowly reaming in several steps. You want these loose enough to be able to move the rocker shaft back and forth by hand, but not so loose that you have any side to side movement. As little as .001” either way will make a huge difference, so don’t be in a big hurry to get this step done. Perhaps you should order 2-3 bushings, just in case you destroy the first one! Install the new lower seal next, and be sure to install it in the correct orientation! It won’t hold the oil in the steering box if you put it in upside down. This should be obvious, but I mention it because we have seen several over the years that were installed upside down, so this concept must escape some folks. Next part to go in is the upper bearing race, then the upper bearing. Make certain that the upper race is fully seated at the top of the box, and then install the bearing in the right direction so the balls roll on the race. You guessed it, we’ve seen plenty instances of this screw-up as well! Slide the inner column and worm gear into place, and watch that the upper bearing and race stay in position. Then you can install the lower bearing, followed by the lower race. The bearings actually ride on bearing surfaces on the top and bottom of the worm gear, as well as the two races you have to install during re- assembly. Shims must be perfectly clean with no specs of dirt, or oil will seep out between the shims. If you can’t clean your old shims, or they have slight grooves from being bent, it’s best to replace them. You’ll have to assemble and disassemble this many times, adding and removing shims until there is zero end play, and just the slightest amount of drag on rotation. The top of the column tube needs a bushing. If rebuilding a one piece column, it is a piece of felt as shown here. TR owners with the two piece columns have a pair of nylon and rubber bushings on either side of the center coupling, and the bushing at the top of the lower tube will need to be installed before you insert the shaft and worm gear, and preferably before installing the upper bearing race and bearing. Now you can install the rocker shaft through the top opening. Double check to make sure the peg is fully seated in the rocker, and then that the peg sits down correctly into the worm gear. Follow up with the top cover and a new gasket, and leave the adjusting screw a little loose for now. Slide the mount casting back onto the steering box, followed by the drop arm. Note the reference lines on the drop arm and in the center of the rocker shaft. You don’t want to install this and be “off” even one spline in either direction! Install the lock tab washer, followed by the large nut. Just as with the removal, you’ll want to hold the drop arm securely and torque the large nut to 80 ft. lb. Then you can bend the tab washer over one of the flats on the large nut. When you install the completed unit back into your car, and start tightening all of the braces at the bottom working your way to the top so you don’t put the column in a bind anywhere. Adjust the top plate screw so you feel a slight drag on the steering wheel as it passes through the center, and then tighten your silent bloc bushings with the steering wheel centered and the tires pointed straight ahead. Fill with oil! If you don't have access to a press or don't want to buy a reamer, you can send your disassembled steering box and rocker shaft here and we'll install the rocker shaft bushing and ream it to size for you. Not interested in doing any part of this yourself? Box it up and ship it here for the crew at Macy's garage to overhaul for you. For basic service, we completely disassemble your old steering box, evaluate the condition of all the parts, bead blast and paint the box and column if you desire, and replace the lower bushing and oil seal, (which are always bad). There's a 50/50 chance that the rocker shaft peg and inner bearings/races will need to be replaced too. We always keep a good supply of new parts in stock, including bearings and races which are difficult to find more often than not and those expensive worm gears which are needed occasionally. We don’t have to tear down your steering box and evaluate it’s need before ordering parts, so normal turn around time is usually only 7-10 days, depending on our workload. Estimating restoration work is normally next to impossible, but we’ve done so many of these that we have it down to a science. For a complete rebuild on a TR2-3B steering box, we are able to Flat Rate these at 7 hours of shop time at out current labor rate, plus parts as required once we get a look inside. If you're interested in having Macy's Garage overhaul your TR2/3 steering box, call or send an e-mail to discuss in greater detail. We're always happy to help you out!